Campervan Recipies for the Road
One of the joys of campervan life is the opportunity to cook delicious meals on the open road. You can savour gourmet dishes amidst stunning landscapes with the right recipes and a well-equipped campervan kitchen. At Vandemonium Outfitters, we’re here to inspire your culinary adventures with these mouthwatering campervan recipes. Don your campervan hoodie and prepare for a taste of adventure with these Campervan Recipes for the Road.
Campervan Breakfast Ideas:
Here are three delicious breakfast recipes that are perfect for preparing in a campervan or on a portable stove:
Campervan Breakfast Burritos
Ingredients:
- 4 large eggs
- 1/2 cup diced bell peppers
- 1/2 cup diced onions
- 1/2 cup diced tomatoes
- 1/2 cup shredded cheddar cheese
- 4 large tortillas
- Salt and pepper to taste
- Cooking oil or butter
Instructions:
- Heat a skillet or frying pan over your portable stove and add a small amount of cooking oil or butter.
- Add diced onions and bell peppers and sauté until they become tender.
- Beat the eggs in a bowl and pour them into the skillet with the sautéed vegetables.
- Scramble the eggs, mixing them with the veggies as they cook.
- Season with salt and pepper once the eggs are cooked to your liking.
- Warm the tortillas in a dry skillet or directly over your portable stove flame.
- Assemble the burritos by placing a portion of the scrambled eggs and veggie mixture onto each tortilla.
- Top with diced tomatoes and shredded cheddar cheese.
- Roll up the tortillas, tucking in the sides to create a burrito.
- Serve hot, and enjoy your campervan breakfast burritos!
Portable Stove Pancakes
Ingredients:
- 1 cup all-purpose flour
- 2 tablespoons sugar (optional, for sweeter pancakes)
- 2 teaspoons baking powder
- 1/4 teaspoon salt
- 1 cup milk
- 1 egg
- 1 tablespoon melted butter
Instructions:
- In a bowl, whisk together the dry ingredients: flour, sugar (if using), baking powder, and salt.
- Whisk together the wet ingredients in another bowl: milk, egg, and melted butter.
- Make a well in the centre of the dry ingredients and pour in the wet ingredients. Gently whisk until just combined. A few lumps are okay, but don’t overmix.
- Heat a lightly oiled pan over medium-low heat on your portable stove.
- Pour about 1/4 cup of batter for each pancake.
- Cook for 2-3 minutes or until bubbles appear on the surface and the edges start to set.
- Flip the pancakes and cook for another 1-2 minutes or until golden brown on the bottom.
- Serve immediately with your favourite toppings like butter, syrup, berries, or whipped cream.
Tips:
- For a quicker prep, premix the dry ingredients at home and store them in an airtight container in your campervan.
- If you don’t have milk, you can substitute it with an equal amount of water.
- Pancake in a Mug Option: If you’re short on space or dishes, you can try the pancake in a mug method. Simply whisk together the ingredients in a mug suitable for microwave use (check the mug for heat resistance). Microwave on high for 1-2 minutes, or until cooked through.
- Use a small, sturdy spatula to flip the pancakes to avoid tearing.
- You can adjust the size of your pancakes depending on your pan and preference.
Campervan Oatmeal with Toppings
This recipe is perfect for a hearty and delicious breakfast on the go in your campervan. It’s easy to customise with whatever toppings you have on hand!
Ingredients (serves 1):
- 1/2 cup rolled oats (or quick oats for faster cooking)
- 1 cup water (or milk for a creamier oatmeal)
- Pinch of salt
- Toppings (choose your favourites!):
- Sweet: Dried fruit (raisins, cranberries, chopped dates), chopped nuts (almonds, walnuts, pecans), honey, maple syrup, brown sugar, chocolate chips, shredded coconut
- Savoury: Grated cheese (cheddar, parmesan), chopped cooked vegetables (bell peppers, mushrooms), crumbled cooked sausage or bacon, chopped fresh herbs (chives, parsley), hot sauce
Instructions:
- In a small pot on your portable stove, combine the oats, water (or milk), and salt.
- Bring to a boil over medium heat.
- Reduce heat to low and simmer for 5-7 minutes for rolled oats, or 2-3 minutes for quick oats, stirring occasionally, until the oats reach your desired consistency.
- Remove from heat and transfer to a bowl.
- Get creative! Add your chosen toppings and stir them in while the oatmeal is hot so they soften slightly.
Campervan-Friendly Tips:
- Pre-portion individual servings of dry oats into small bags for quicker mornings on the road.
- Pack shelf-stable toppings like nuts, dried fruit, and chocolate chips.
- If using fresh fruit, bring a small container and chop it just before serving.
- For savoury options, consider pre-cooking bacon or sausage at home and storing it in a sealed container in your cooler.
- Pack a small container of grated cheese or a shaker of parmesan for a quick savoury addition.
- Get creative with spices! Add a pinch of cinnamon for a warm touch, or nutmeg for a hint of fall flavour.
Bonus Tip: If you have a little extra time and butter, try toasting your oats in the pot before adding the water/milk. This adds a delicious nutty flavour to the oatmeal.
These breakfast recipes are easy to prepare in a campervan or on a portable stove, ensuring you start your day with a satisfying meal while enjoying the great outdoors.
Campervan Safety Tips: Staying Secure on the Road
Campervan Lunch Ideas
Here are three delicious lunch recipes that are perfect for preparing in a campervan or on a portable stove:
Campervan Veggie Quesadillas
Ingredients:
- 4 large flour tortillas
- 1 cup shredded cheddar cheese
- 1 cup cooked black beans
- 1 cup diced bell peppers
- 1 cup diced onions
- 1 cup corn kernels (canned or frozen)
- 1 tablespoon olive oil
- Salt and pepper to taste
- Optional toppings: salsa, sour cream, guacamole
Instructions:
- Heat a skillet or frying pan over your portable stove and add olive oil.
- Add diced onions and bell peppers to the skillet and sauté until they become tender.
- Add corn kernels and cooked black beans to the skillet and heat through.
- Season the mixture with salt and pepper to taste.
- Place one tortilla in the skillet and sprinkle with a portion of shredded cheddar cheese.
- Spoon some of the vegetable and bean mixture evenly over the cheese.
- Top with another tortilla.
- Cook until the bottom tortilla is golden brown, then carefully flip the quesadilla and cook the other side until it’s crispy and the cheese is melted.
- Remove from the skillet, let it cool for a minute, then slice into wedges.
- Serve with optional toppings like salsa, sour cream, or guacamole.
Portable Stove Pasta Primavera
This recipe brings the vibrant flavours of Pasta Primavera to your campervan with minimal dishes and easy preparation on your portable stove.
Ingredients (serves 1-2):
- 1/2 cup dried pasta (small shapes like penne, orzo, or rotini work well)
- 1 tablespoon olive oil
- 1/2 cup chopped vegetables (choose a combination of your favourites, such as zucchini, yellow squash, asparagus, bell peppers, or cherry tomatoes)
- 1 clove garlic, minced
- 1/4 cup chopped fresh herbs (optional, like parsley, basil, or oregano)
- 1/2 cup water (or vegetable broth for added flavour)
- Salt and pepper to taste
- 1-2 tablespoons grated parmesan cheese (optional)
Instructions:
- Heat the olive oil over medium heat in a wide, deep pot suitable for your portable stove.
- Add the chopped vegetables and cook for 3-4 minutes or until softened slightly.
- Add the minced garlic and cook for another minute, stirring frequently, until fragrant.
- Stir in the dried pasta, salt, and pepper.
- Pour in the water (or broth). Make sure there’s enough liquid to just cover the pasta. If needed, add a little more water gradually throughout cooking.
- Bring the mixture to a boil, then reduce heat to low and simmer for 8-10 minutes, or until the pasta is cooked through and the liquid is absorbed. Stir occasionally to prevent sticking.
- Once cooked, remove from heat and stir in the chopped fresh herbs (if using).
- Taste and adjust seasonings with additional salt and pepper if needed.
- Serve immediately in the pot or transfer to a bowl.
- Top with grated parmesan cheese (optional) and enjoy!
Portable Stove Tips:
- Use a single, wide pot to minimize dishes. This pot will cook both the vegetables and pasta.
- Choose pre-chopped vegetables to save on prep time.
- Pack shelf-stable ingredients like dried pasta, olive oil, and parmesan cheese for easy storage.
- Store fresh herbs in a sealed container in your cooler and chop them just before serving.
- Consider pre-measuring spices and salt/pepper into small containers for easy addition on the go.
Campervan Grilled Cheese Sandwiches
The beauty of grilled cheese is its simplicity, which translates perfectly to campervan cooking! Here’s how to create a delicious and satisfying grilled cheese using your portable stove:
Ingredients (makes 1 sandwich):
- 2 slices of bread (white, sourdough, wheat – choose your favourite!)
- 1-2 tablespoons butter (softened or melted)
- 2-3 slices of cheese (experiment with different varieties for flavour combinations! Cheddar, swiss, mozzarella, brie, or a mix all work well)
- Optional additions: Sliced tomato, thinly sliced ham or turkey, a sprinkle of dried herbs (like thyme or oregano)
Instructions:
- Prep your cheese: Slice your chosen cheese to a thickness you prefer. Thicker slices will take longer to melt but provide a more satisfying bite.
- Butter your bread: Spread softened or melted butter on one side of each bread slice.
- Assemble your sandwich: Place one slice of bread, buttered-side down, on your cooking surface (a frying pan or griddle on your portable stove). Top it with your cheese slices. If using additional ingredients, layer them on top of the cheese. Finally, add the other slice of bread, buttered side facing up.
- Cooking the magic: Heat your pan over medium-low heat. This allows the cheese to melt evenly without burning the bread.
- Golden perfection: Cook for 2-3 minutes per side or until the bread is golden brown and crispy. Gently press down on the sandwich with a spatula to ensure even browning and melting.
- The big reveal (and maybe a flip): Carefully peek under the bread to check for browning. If needed, gently flip the sandwich and cook for another 1-2 minutes on the other side.
- Melty heaven: Once both sides are golden brown and the cheese is melted, remove the sandwich from the heat and let it cool slightly before taking that first delicious bite!
Campervan-Friendly Tips:
- Use a sturdy spatula to prevent tearing the bread while flipping.
- Pack pre-sliced cheese to save on prep time.
- Opt for shelf-stable ingredients like butter and pre-sliced bread for easy storage.
- Store fresh ingredients like tomatoes in a sealed container and slice them just before assembling your sandwich.
- To save on dishes, you can even eat your grilled cheese straight out of the pan!
Bonus Tip:
- For a fun twist, try using a tortilla instead of bread for a “grilled cheese quesadilla” variation.
These lunch recipes are delicious and easy to prepare in a campervan or on a portable stove, making them ideal for enjoying a satisfying meal during your outdoor adventures.
Choosing the Right Size for Your Needs
Campervan Dinner Recipes
Here are three hearty dinner recipes that are perfect for preparing in a campervan or on a portable stove:
Campervan One-Pot Chili
Ingredients:
- 1 pound ground beef or ground turkey
- 1 onion, diced
- 1 bell pepper, diced
- 2 cloves garlic, minced
- 1 can (15 oz) kidney beans, drained and rinsed
- 1 can (15 oz) black beans, drained and rinsed
- 1 can (14 oz) diced tomatoes
- 1 can (6 oz) tomato paste
- 1 cup water
- 2 tablespoons chili powder
- 1 teaspoon cumin
- Salt and pepper to taste
- Optional toppings: shredded cheese, sour cream, chopped green onions
Instructions:
- Heat a large pot or Dutch oven over your portable stove.
- Add the ground beef or turkey and cook until browned. Drain any excess fat.
- Add diced onions, bell peppers, and minced garlic to the pot. Sauté until the vegetables are tender.
- Stir in the kidney beans, black beans, diced tomatoes, and tomato paste.
- Add water, chilli powder, cumin, salt, and pepper. Stir to combine.
- Bring the chilli to a simmer and let it cook for about 20-30 minutes, stirring occasionally.
- Taste and adjust seasonings as needed.
- Serve the campervan one-pot chilli hot with your choice of toppings.
Campfire Skillet Fajitas
Ingredients (serves 2-3):
- 1 boneless, skinless chicken breast, thinly sliced
- 1 tablespoon olive oil
- 1/2 onion, thinly sliced
- 1 bell pepper (any color), thinly sliced
- 1/2 cup chopped vegetables (optional – try poblano pepper, zucchini, or mushrooms)
- 1 clove garlic, minced
- 1/2 teaspoon chili powder
- 1/4 teaspoon cumin
- 1/4 teaspoon smoked paprika (optional, for a smoky flavor)
- Salt and pepper to taste
- 4 fajita wraps (or tortillas)
- Toppings (choose your favorites!): shredded cheese, salsa, sour cream, guacamole, chopped lettuce, sliced avocado
Instructions:
- Prep by the campfire: While the fire is getting nice and hot, slice the chicken breast, onion, bell pepper, and any other vegetables you’re using. Mince the garlic and pre-measure your spices.
- Heat the skillet: Place your cast iron skillet over the medium heat coals of your campfire. Add the olive oil and let it heat up for a minute.
- Sizzle the chicken: Add the sliced chicken to the hot skillet and cook for 3-4 minutes, stirring occasionally, until golden brown and cooked through. Remove the chicken from the pan and set aside on a plate.
- Veggie fiesta: Add the sliced onion, bell pepper, and any additional chopped vegetables to the skillet. Sauté for 5-7 minutes, or until softened and slightly browned, stirring frequently.
- Spice it up: Add the minced garlic, chili powder, cumin, and smoked paprika (if using) to the vegetables. Cook for another minute, stirring constantly, to release the fragrance of the spices.
- Bringing it together: Season the vegetables with salt and pepper to taste. Add the cooked chicken back to the skillet and toss to combine with the flavorful veggies.
- Warm those wraps: While the filling simmers, you can optionally warm your tortillas over the low heat coals of the campfire. Wrap them in aluminum foil to keep them warm and soft.
- Fiesta time! Serve the hot skillet filling with the warmed tortillas and your favorite toppings. Let everyone assemble their own fajitas and enjoy a delicious and satisfying campfire meal!
Campfire Cooking Tips:
- Cast iron skillets are ideal for campfire cooking because they retain heat well.
- Use a long-handled spatula for easy maneuvering around the hot fire.
- Keep a fire extinguisher or a bucket of sand nearby in case of emergencies.
- Food safety tip: Maintain proper food handling practices to avoid contamination. Cook chicken thoroughly (internal temperature of 165°F) and keep cooked food hot until serving.
Optional Variations:
- Shrimp Fajitas: Substitute the chicken with pre-cooked shrimp for a seafood twist.
- Veggie Fajitas: Opt for a vegetarian option by omitting the chicken and using a variety of colourful vegetables.
- Breakfast Skillet: For a breakfast twist, scramble eggs in the skillet, add chopped cooked sausage or bacon, and top with shredded cheese and salsa.
Campervan Spaghetti Aglio e Olio
This recipe brings the classic Italian dish of Spaghetti Aglio e Olio (Garlic, Oil, and Pepper) to your campervan in a simple and delicious way, perfect for a quick and satisfying meal on the go.
Ingredients (serves 1-2):
- 2-3 tablespoons olive oil
- 2-3 cloves garlic, thinly sliced
- Pinch of red pepper flakes (optional, for a bit of heat)
- 1/2 cup dried spaghetti
- 1/4 cup water (pasta water)
- Salt and freshly ground black pepper to taste
- Fresh parsley, chopped (optional, for garnish)
- Parmesan cheese, grated (optional)
Campervan Twists:
- Pre-measure dry ingredients: To save time, pre-measure the dried spaghetti for single servings and store them in small, sealable bags in your campervan.
- Pantry-friendly garlic: Instead of fresh garlic, you can use 1/2 teaspoon of garlic powder for a shelf-stable option.
- One-pot wonder: This recipe uses just one pot for cooking the pasta and creating the sauce, minimizing dishes.
Instructions:
- Heat the olive oil: Heat the olive oil over medium heat in a wide pot suitable for your portable stove.
- Garlic magic: Add the sliced garlic and cook for 30 seconds to 1 minute or until fragrant and lightly golden brown. Be careful not to burn the garlic as it can turn bitter.
- Spice it up (optional): If using red pepper flakes, add them to the pan with the garlic and cook for a few seconds just to release their aroma.
- Pasta time: Add the dry spaghetti to the pot with the garlic and oil. Stir to coat the pasta with the oil.
- Water magic: Pour in the water (about 1/4 cup) and bring to a boil. This pasta water will help create a silky sauce.
- The simmer: Reduce heat to low, cover the pot with a lid, and simmer for 8-10 minutes, or until the pasta is cooked through al dente (with a slight bite). Stir occasionally to ensure even cooking and prevent sticking.
- The secret weapon: As the pasta cooks, reserve about 1/4 cup of the starchy pasta water before draining. This starchy water helps create a smooth and creamy sauce.
- Seasoning symphony: Once cooked, remove the pot from heat and season with salt and freshly ground black pepper to taste.
- The final touch: Add a splash of the reserved pasta water (about a tablespoon at a time) to the pasta, tossing it gently to create a light and silky sauce.
- Serve and enjoy: Plate your delicious Spaghetti Aglio e Olio and garnish with chopped fresh parsley (if using) and a sprinkle of grated parmesan cheese (optional).
Campervan-Friendly Tips:
- Use a wide pot to allow the pasta to cook evenly.
- A single, sturdy spatula is all you need for stirring and serving.
- Consider using pre-shredded parmesan cheese for a quicker and easier option.
- Leftovers? While not ideal, you can store leftover pasta in an airtight container in the refrigerator for up to a day. Reheat gently on the stovetop with a splash of water or broth to prevent drying out.
These dinner recipes are easy to prepare and perfect for enjoying in a campervan or outdoor setting, making your camping adventures even more delightful.
Campervan Maintenance Checklist: Keeping Your Home on Wheels in Top Shape
A few more campervan meal ideas:
Grilled Veggie Skewers:
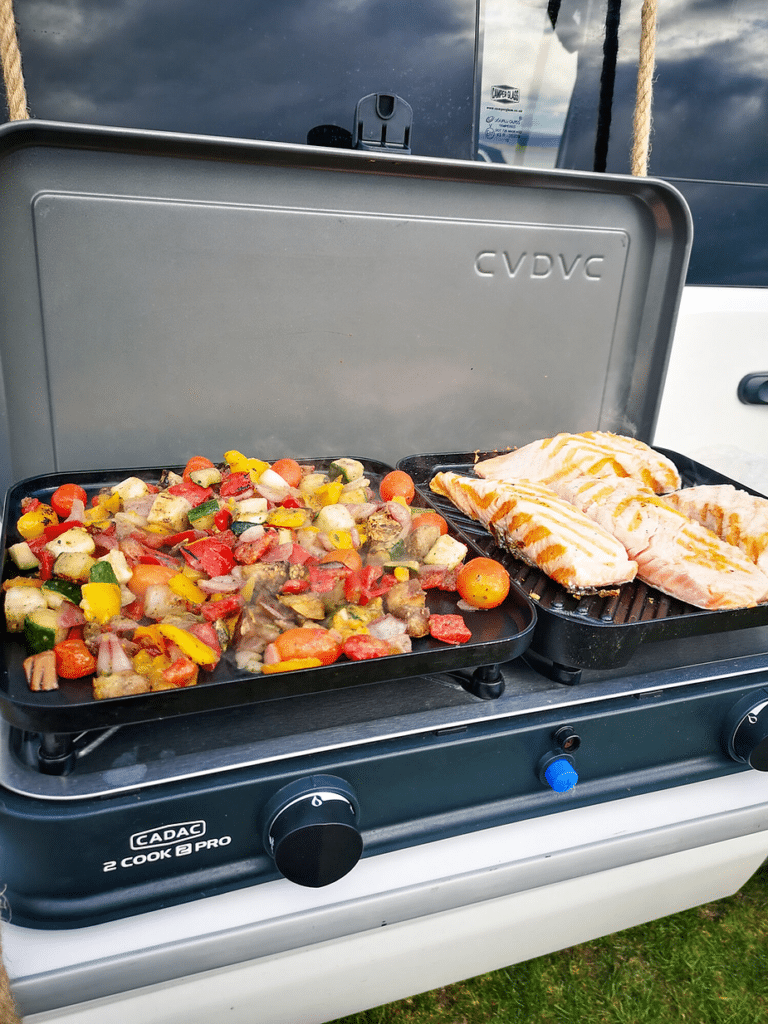
Embrace the beauty of outdoor cooking with grilled veggie skewers. Marinate your favourite vegetables, thread them onto skewers, and grill until tender and slightly charred. These are perfect for a campfire or portable grill.
A Beginner’s Guide to Campervan Types
Campervan Pizza:
Who doesn’t love pizza? Make your own campervan pizza using pre-made pizza dough or pita bread. Add sauce, cheese, and your favourite toppings, then bake until bubbly and golden.
Choosing the Right Size Van for Your Needs
Campervan Stir-Fry:
Create a campervan stir-fry by sautéing thinly sliced meat, vegetables, and your choice of sauce in a hot pan. Serve over rice or noodles for a quick and flavorful meal.
Campervan Safety Tips: Staying Secure on the Road
Campervan S’mores:
Don’t forget dessert! For a sweet treat, make classic campervan s’mores by roasting marshmallows or using a portable grill over the campfire. Sandwich them between graham crackers and chocolate squares.
Campervan Maintenance Checklist: Keeping Your Home on Wheels in Top Shape
Campervan Coffee:
Start your morning with a perfect cup of campervan coffee. Invest in a French press or portable coffee maker and savour the aroma of freshly brewed coffee as you watch the sunrise.
Choosing the Right Size for Your Needs
Conclusion: Campervan Recipes for the Road
Cooking up adventure in your campervan is a delightful part of the journey. With these recipes and a well-stocked campervan kitchen, you can enjoy gourmet meals amidst the beauty of the great outdoors. So, pack your culinary essentials, don your campervan hoodie, and prepare to savour the flavours of your campervan adventures.
Continue your campervan adventure with our upcoming blogs:
A Beginner’s Guide to Campervan Types
Choosing the Right Size for Your Needs
Cooking Up Adventure: Campervan Recipes for the Road
Campervan Safety Tips: Staying Secure on the Road
Campervan Maintenance Checklist: Keeping Your Home on Wheels in Top Shape
Stay tuned for more campervan inspiration and practical tips for your next road trip.

